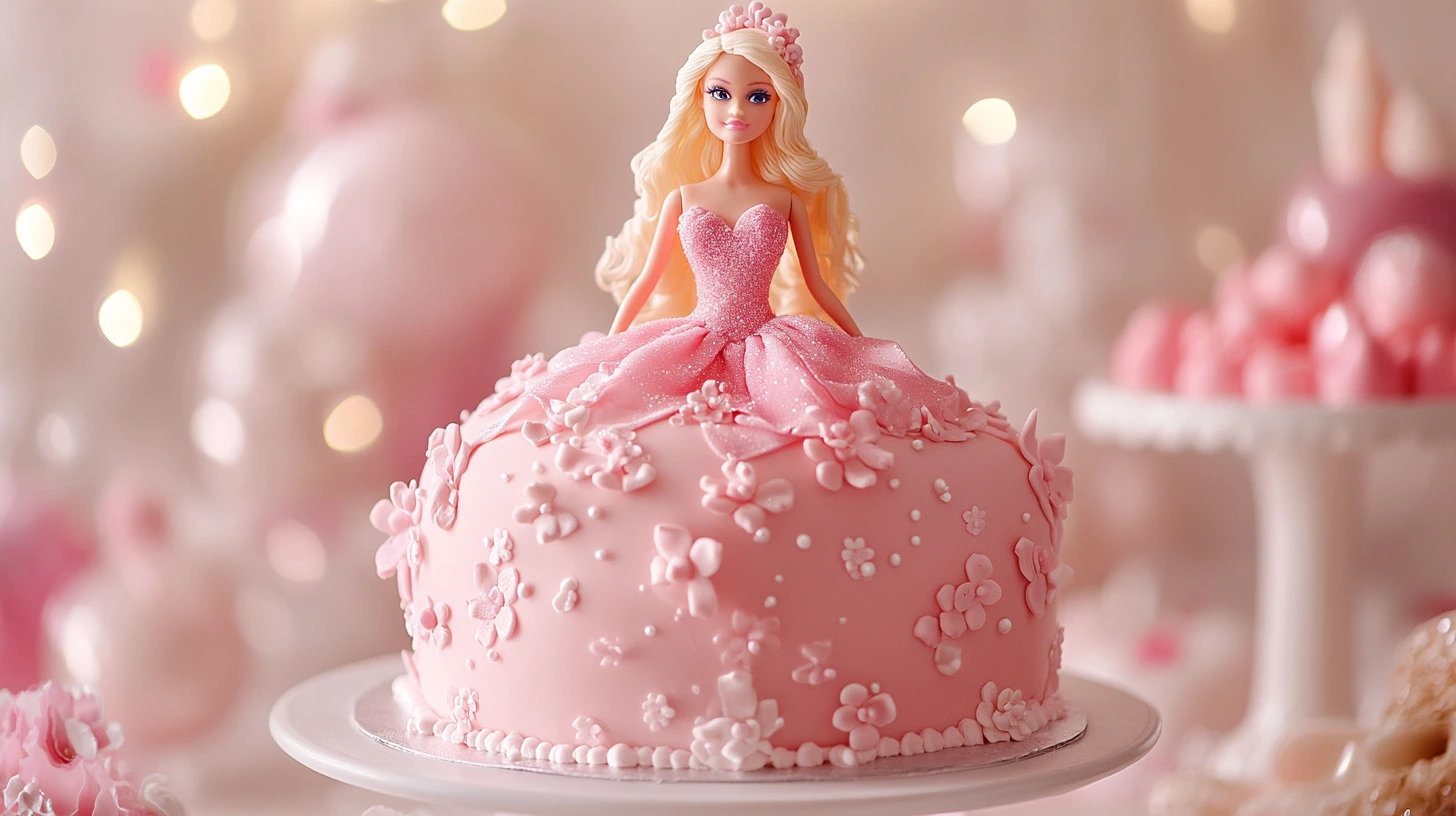
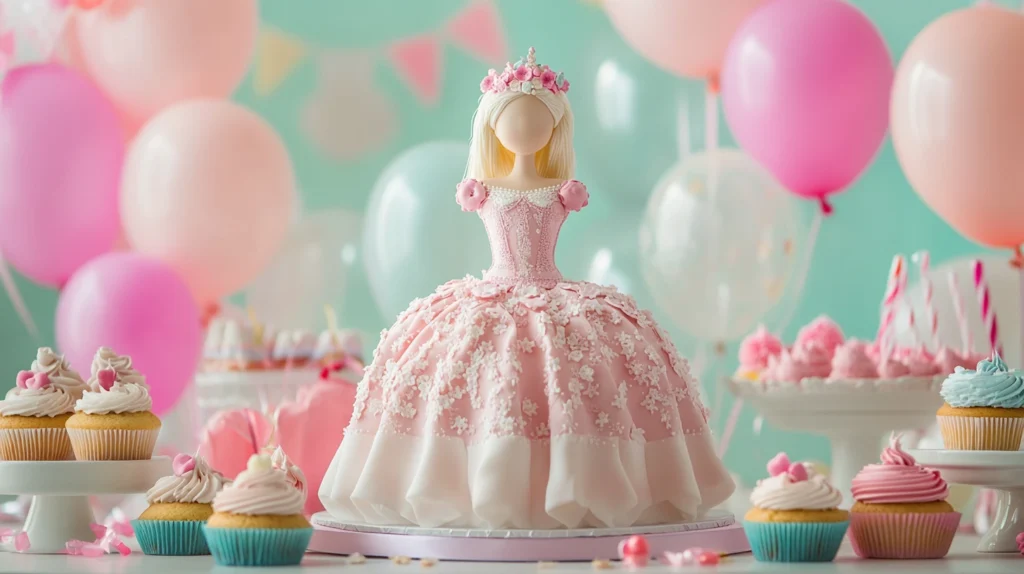
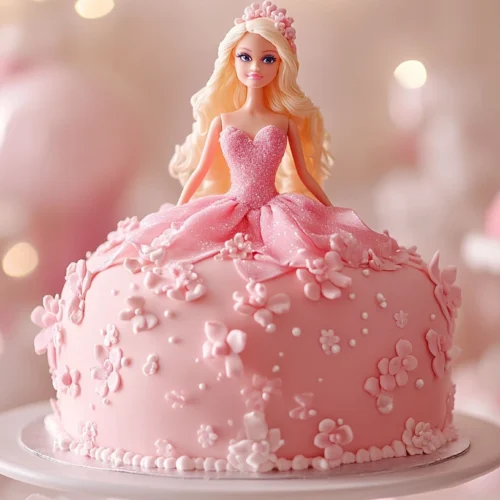
A Barbie cake is a showstopping centerpiece that blends the magic of a beloved doll with the creativity of cake decorating. Whether for a child’s birthday, a themed party, or a special event, a Barbie cake always brings joy and excitement. The design typically features a Barbie doll inserted into the center of a cake sculpted and decorated to resemble a flowing gown.
The popularity of Barbie cakes dates back decades, as Barbie has been an iconic figure in children’s lives since her debut in 1959. Over time, cake decorators and bakers have evolved the concept, using modern techniques such as buttercream piping, fondant draping, and edible embellishments to create breathtaking designs.
In this guide, you’ll learn everything you need to know to make a Barbie cake from scratch, from choosing the right doll to decorating it like a professional. Whether you prefer a simple buttercream design or an elaborate fondant masterpiece, this step-by-step guide will ensure your Barbie cake turns out spectacular!
Essential Ingredients and Tools
Before starting, it’s crucial to gather the right ingredients and tools to make the baking and decorating process smooth.
Cake Ingredients
Your Barbie cake can be made with any cake flavor, but it’s best to choose a sturdy cake that holds its shape well. Some great options include:
- Vanilla sponge cake – Light and fluffy yet firm enough for stacking.
- Chocolate cake – Rich and delicious, pairs well with many frostings.
- Red velvet cake – A classic choice for an elegant touch.
- Funfetti cake – Perfect for kids who love colorful surprises inside!
- Lemon or strawberry cake – Fresh, fruity flavors that complement pastel Barbie themes.
Basic Ingredients You’ll Need:
All-purpose flour (or cake flour for a softer texture)
Sugar (granulated or powdered)
Eggs (for structure and moisture)
Butter or oil (for richness)
Baking powder & baking soda (for leavening)
Milk or buttermilk (for softness)
Vanilla extract (for flavor enhancement)
Frosting & Decoration Supplies
The frosting is what makes your Barbie cake truly stunning. You can choose from:
- Buttercream frosting – Smooth and creamy, easy to pipe and spread.
- Whipped cream frosting – Light and airy but may not hold intricate designs well.
- Fondant – Great for smooth, elegant designs but requires skill to handle.
- Ganache – A luxurious option for a glossy finish.
💡 Other Decoration Supplies:
- Gel food coloring (for vibrant dress colors)
- Piping bags and tips (for intricate designs)
- Edible glitter, pearls, and sprinkles
- Edible flowers or sugar decorations
Required Baking Tools
To make your Barbie cake effortlessly, you’ll need the following tools:
Dome-shaped cake pan or round cake pans – To create the skirt shape
Turntable – For smooth frosting application
Offset spatula – Helps spread frosting evenly
Cake board – To support the cake when moving it
Serrated knife – For leveling cake layers
Rolling pin (for fondant cakes) – To smooth out fondant for a flawless look
By gathering all the right ingredients and tools ahead of time, you’ll ensure a stress-free baking experience.
Choosing the Perfect Barbie Doll
Selecting the right Barbie doll is a crucial step in making your Barbie cake. The doll serves as the centerpiece of the cake, so it’s important to choose one that fits well, is safe for food contact, and matches the theme of your cake.
Best Types of Dolls for a Barbie Cake
While any standard 11.5-inch Barbie doll can work, some are better suited for cakes. Consider the following options:
- Classic Barbie Doll – The standard Barbie with movable arms and long hair is a versatile choice.
- Princess Barbie or Fairytale Barbie – If you’re going for a royal or fantasy theme, a princess or fairy Barbie with themed accessories can enhance the look.
- Mermaid Barbie – Perfect for an under-the-sea-themed cake, although the mermaid tail may require additional cake sculpting.
- Barbie Fashionista – A modern alternative with diverse skin tones, hairstyles, and outfits to match the recipient’s preferences.
- Mini Barbie Dolls – If you prefer a smaller cake, using a mini Barbie doll (like Chelsea dolls) can be a great option.
How to Prepare the Barbie Doll for the Cake
Since the doll will be placed directly into the cake, it’s important to prepare it properly to maintain hygiene and fit seamlessly into the design.
Clean the doll thoroughly – Wash the doll’s body and hair with mild soap and water before inserting it into the cake.
Wrap the lower half in plastic wrap – This prevents cake crumbs or frosting from getting onto the doll.
Remove unnecessary clothing – If the Barbie is wearing an outfit, remove it or only leave the top part visible.
Trim or tie back long hair – Long Barbie hair can get in the way when decorating, so consider tying it up or styling it neatly.
Alternative Cake Toppers if You Don’t Have a Barbie Doll
If you don’t have a physical Barbie doll, there are still ways to achieve the same beautiful look:
- Edible Barbie Topper – Some bakeries offer printed edible images of Barbie that can be placed on fondant or buttercream.
- Paper Doll Cutout – A printed and laminated Barbie image attached to a stick can be inserted into the cake.
- Toy Barbie Accessories – Use Barbie’s accessories (like tiaras, shoes, or a mini purse) to add character to the cake.
By choosing the right doll and preparing it properly, you’ll ensure that your Barbie cake not only looks amazing but is also food-safe and easy to serve.
Baking the Cake Base
The foundation of a stunning Barbie cake is a well-baked, sturdy, and flavorful cake. Since this cake needs to support the weight of the Barbie doll and hold its shape, choosing the right recipe and baking techniques is essential.
Best Cake Flavors for a Barbie Cake
While you can use almost any cake flavor, it’s best to select a firm, yet moist cake that can handle stacking and carving. Some of the best choices include:
- Vanilla Cake – A classic choice that pairs well with any frosting and filling.
- Chocolate Cake – Rich and decadent, loved by kids and adults alike.
- Red Velvet Cake – Beautiful color and a slightly tangy taste.
- Strawberry Cake – Light, fruity, and perfect for a pink-themed Barbie dress.
- Funfetti Cake – A festive choice with colorful sprinkles inside.
💡 Tip: Avoid cakes that are too soft, like chiffon or angel food cake, as they might collapse when stacking.
How to Stack Layers for the Barbie Cake
To create the signature Barbie skirt shape, you’ll need multiple layers of cake. There are two common ways to achieve this:
Using a Dome-Shaped Cake Pan
- A dome cake pan or bundt cake pan naturally creates a skirt shape.
- Bake a single large dome-shaped cake and trim the bottom to make it stable.
Stacking Round Cake Layers
- Bake 3 to 5 round cakes in 6-inch or 8-inch pans.
- Stack the layers with frosting between each.
- Carve the top layers into a dome shape to resemble a flowing dress.
📌 Pro Tip: If you need extra height, you can bake additional cake layers or use a small cake stand beneath the cake before inserting the Barbie doll.
Baking & Cooling Tips
Follow these baking tips to ensure your cake turns out perfect:
Preheat your oven – Set your oven to 325°F to 350°F (163°C to 177°C) to ensure even baking.
Grease and line cake pans – Use parchment paper or non-stick spray to prevent sticking.
Do not overmix the batter – Overmixing can lead to a dense cake. Mix just until combined.
Check for doneness – Insert a toothpick into the center. If it comes out clean, the cake is ready.
Cool completely before decorating – Allow cakes to cool on a wire rack for at least 1 hour to prevent melting frosting.
Leveling and Carving the Cake
Once the cakes have cooled, it’s time to prepare them for decorating:
Trim the tops – Use a serrated knife to level each layer for a stable stack.
Carve the dome shape – If stacking layers, gradually carve the top layers into a curved skirt shape.
Apply a crumb coat – A thin layer of frosting will trap loose crumbs before final decorating.
With your cake base baked, stacked, and shaped, you’re ready for the exciting part—inserting the Barbie doll and decorating the dress!
Assembling and Sculpting the Cake
Now that your cake layers are baked, stacked, and shaped, it’s time to assemble the Barbie cake and prepare it for decoration. This step includes inserting the Barbie doll, sculpting the skirt, and ensuring stability for a flawless final result.
Creating the Skirt Shape
To achieve the perfect Barbie dress shape, follow these steps:
1️⃣ Stack the Cake Layers:
- Place the first cake layer on a sturdy cake board.
- Spread a layer of buttercream or ganache before adding the next layer.
- Repeat until all cake layers are stacked, ensuring they are even.
2️⃣ Carve the Cake into a Skirt:
- Using a serrated knife, trim the cake to create a gentle dome shape.
- Start carving from the top down, gradually rounding the edges for a natural dress flow.
- Remove small amounts at a time to avoid over-carving.
3️⃣ Apply a Crumb Coat:
- Spread a thin layer of frosting around the entire cake.
- This traps any loose crumbs and makes it easier to apply the final frosting.
- Refrigerate for 15-30 minutes to set the crumb coat.
📌 Pro Tip: If your cake is very soft, chill it before carving to prevent breakage.
Placing the Barbie Doll Securely
The Barbie doll is the star of the cake, so it needs to be inserted properly to ensure it stands upright without shifting.
Measure and Wrap the Doll:
- Remove the legs if using a full-size Barbie (optional, but helps with fit).
- Wrap the lower half of the doll in plastic wrap or fondant to keep it food-safe.
Create a Hole in the Cake:
- Use a small knife or a cylinder cutter to cut a hole in the center of the cake.
- Make sure the hole is wide enough for the Barbie but not too loose.
Insert the Barbie Gently:
- Carefully place the wrapped Barbie into the hole.
- If the Barbie is too tall, trim some cake from the bottom.
- Secure with extra frosting or cake scraps around the base if needed.
💡 Alternative Method: If you don’t want to insert the actual Barbie, you can use a paper cutout or an edible printed image of Barbie on top of the cake instead.
Ensuring Cake Stability
To keep the cake sturdy and prevent it from collapsing or tilting, follow these tips:
Use Dowels for Support – Insert wooden or plastic cake dowels inside the cake for added strength.
Chill the Cake Before Decorating – Refrigerating the cake for at least 1 hour will help it firm up.
Keep the Cake on a Sturdy Board – Use a thick cake board to support the weight.
Once your Barbie is securely placed and the cake is stable, you’re ready for the most exciting part—decorating the Barbie dress with frosting, fondant, and beautiful details!
Decorating the Barbie Cake
Now comes the most exciting part—turning your cake into a stunning Barbie gown! Whether you choose buttercream, fondant, or a mix of both, this step will bring your cake to life with beautiful textures, colors, and intricate details.
Buttercream vs. Fondant: Which One to Use?
The choice between buttercream and fondant depends on the style of decoration you prefer.
✅ Buttercream
Easy to spread and pipe
Creates a soft, ruffled texture
️ More flavorful than fondant
Great for rosette-style dresses
✅ Fondant
Provides a smooth, elegant finish
Allows for detailed sculpting (bows, flowers, pleats)
Holds its shape better in warm weather
Ideal for a luxurious gown look
📌 Tip: You can use a combination of both—fondant for the main dress structure and buttercream for ruffles and details.
Step-by-Step Guide to Decorating
1️⃣ Coloring the Frosting or Fondant
- Use gel food coloring to achieve vibrant hues without affecting texture.
- Popular Barbie colors: Pink, lavender, blue, gold, white, and ombre shades.
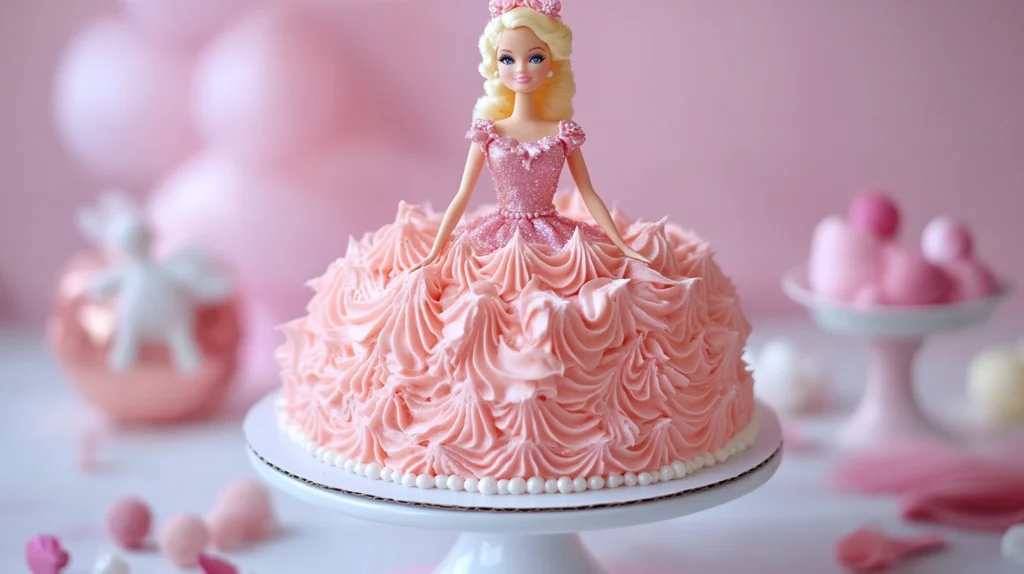
2️⃣ Creating the Skirt Design
Buttercream Option:
- Use a star tip (Wilton 1M) to pipe rosettes for a fluffy dress.
- Use a petal tip (Wilton 104) for ruffles or pleats.
- Blend colors to create an ombre effect from dark to light.
Fondant Option:
- Roll out fondant and drape it over the cake for a smooth satin look.
- Use fondant tools to create pleats, frills, or embossed patterns.
- Add fondant bows, pearls, or flowers for extra detail.
3️⃣ Adding Edible Decorations
Make your Barbie cake sparkle with edible accents:
Edible pearls & sugar beads – Add elegance to the dress.
Edible glitter – For a princess-like shimmer.
Fondant flowers – Create a floral dress design.
Gold or silver dust – To enhance details on the gown.
📌 Tip: If you want a lace effect, use a lace silicone mold with fondant or royal icing!
4️⃣ Perfecting Barbie’s Top Half
- If Barbie is wearing a top, match it with the cake design.
- If not, cover her torso with fondant, buttercream, or fabric for a seamless look.
- Use piped designs or small fondant embellishments to blend the doll with the dress.
Creative Color Combinations & Styling Ideas
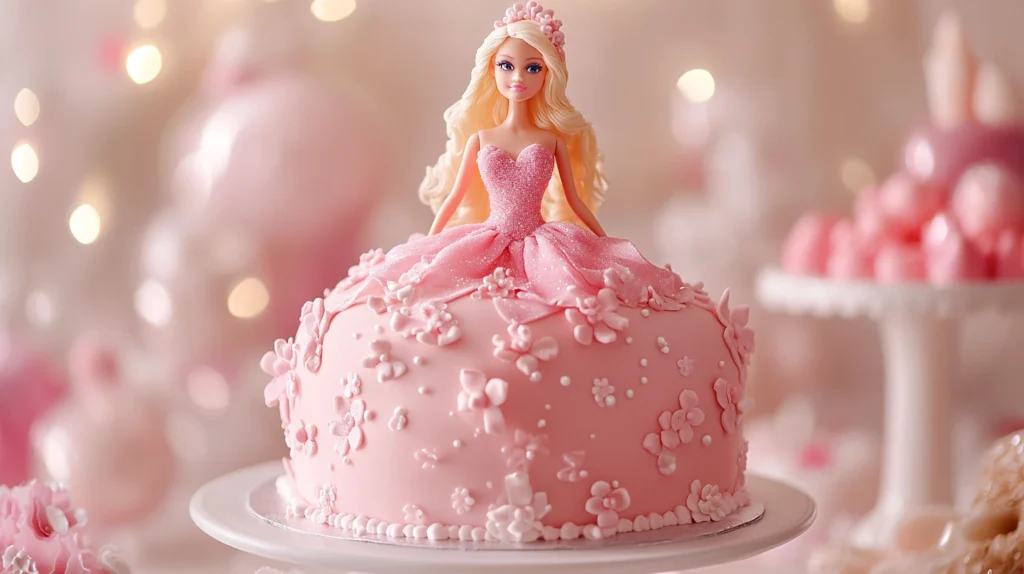
- 🎀 Classic Pink Princess – Light pink ruffles with edible pearls.
- ❄️ Frozen-Themed Barbie – Blue and silver fondant with snowflake designs.
- 🌸 Floral Barbie – Handcrafted fondant roses in ombre pinks and purples.
- 🧜♀️ Mermaid Barbie Cake – A gradient of blues and greens with fondant seashells.
- 🌟 Gold & White Glam Barbie – Elegant fondant pleats with gold edible dust.
Once decorated, chill the cake for 30 minutes before serving to set the details in place.
Creative Themes and Design Ideas
Barbie cakes offer endless possibilities when it comes to themes and designs. Whether you’re creating a classic princess look or a modern fashion-forward Barbie, here are some of the most stunning ideas to inspire your cake design.
1️⃣ Princess Barbie Cake 👑
A classic princess gown is one of the most popular Barbie cake designs.
🎨 Color Palette: Soft pink, white, or lavender
🎀 Design Elements:
Buttercream rosettes to create a voluminous dress
Fondant pleats for an elegant, flowy effect
️ Edible pearls and glitter for a regal touch
️ Gold or silver crown topper to complete the look
📌 Tip: Use an ombre effect where the dress starts darker at the bottom and gradually gets lighter toward the top.
2️⃣ Frozen-Themed Barbie Cake ❄️
Inspired by Elsa from Disney’s Frozen, this design features icy blues and shimmering details.
🎨 Color Palette: Shades of blue, white, and silver
🎀 Design Elements:
Fondant snowflakes for a winter wonderland effect
Silver edible glitter to make the dress sparkle
White buttercream ruffles resembling flowing ice
Piped icicle designs on the dress
📌 Tip: Use rock candy or edible sugar crystals to mimic ice shards around the skirt.
3️⃣ Mermaid Barbie Cake 🧜♀️
A mermaid-inspired Barbie cake is perfect for ocean lovers and fans of Ariel from The Little Mermaid.
🎨 Color Palette: Aqua, turquoise, purple, and coral
🎀 Design Elements:
Buttercream waves and seafoam textures
Fondant seashells, pearls, and starfish
Scalloped fondant pieces resembling mermaid scales
Shimmery edible dust for an underwater glow
📌 Tip: Use a gradient effect where the colors blend from deep ocean blue to light seafoam green.
4️⃣ Floral Barbie Cake 🌸
A floral-themed Barbie cake is elegant and works well for tea parties or garden-themed birthdays.
🎨 Color Palette: Soft pastels like blush pink, lilac, and mint green
🎀 Design Elements:
Handcrafted fondant roses, peonies, and daisies
Piped buttercream flowers and vines
Gold leaf accents for a touch of luxury
Buttercream lace designs for added texture
📌 Tip: Mix real edible flowers like lavender or violets with fondant flowers for a natural look.
5️⃣ Fashionista Barbie Cake 💃
For a modern and chic Barbie, go for a high-fashion gown inspired by runway trends.
🎨 Color Palette: Bold colors like black, gold, or neon pink
🎀 Design Elements:
Metallic fondant draping for a high-fashion look
Sleek buttercream textures instead of traditional ruffles
Mini edible handbags, sunglasses, and high heels
Glitter accents and edible sequins for a stylish finish
📌 Tip: Try a black-and-gold theme for a glamorous Barbie look.
Bonus: Other Unique Themes
- 🎉 Rainbow Barbie Cake – Bright layers of colored cake inside for a surprise effect.
- 🎩 Masquerade Ball Barbie Cake – A sophisticated gown with a mini fondant mask.
- 💜 Galaxy Barbie Cake – Deep purples, blues, and edible stars for a cosmic look.
- 🍭 Candyland Barbie Cake – A dress made of piped candy swirls and lollipops.
With so many creative themes, you can customize your Barbie cake to match any special occasion or personality!
Common Mistakes to Avoid
Even experienced bakers can run into challenges when making a Barbie cake. To ensure a smooth and successful baking process, here are some common mistakes and how to avoid them.
1️⃣ Overbaking or Underbaking the Cake
One of the biggest issues is an unevenly baked or dry cake.
🚫 Mistake:
- Overbaking leads to a dry, crumbly cake that’s hard to shape.
- Underbaking results in a wet center, making it difficult to support the Barbie doll.
✅ Solution:
Use an oven thermometer to ensure accurate temperature settings.
Test doneness with a toothpick—insert it into the center, and if it comes out clean, the cake is ready.
Bake at a lower temperature (325°F/163°C) for a longer time to prevent over-browning while ensuring the inside is fully cooked.
2️⃣ Cake Not Holding Its Shape
If the cake is too soft, it may collapse under the weight of the Barbie doll and decorations.
🚫 Mistake:
- Using a light and airy cake (e.g., chiffon cake) instead of a firm cake.
- Assembling the cake while it’s still warm and soft.
✅ Solution:
Choose a sturdy cake recipe like vanilla, chocolate, or red velvet.
Chill the cake for at least 30-60 minutes before carving or decorating.
Apply a crumb coat (thin layer of frosting) before adding final decorations to stabilize the structure.
3️⃣ Doll Not Staying in Place
A common issue is the Barbie doll tipping over or sinking into the cake.
🚫 Mistake:
- The hole for the doll is too wide, causing instability.
- The doll is inserted without proper support.
✅ Solution:
Wrap the lower half of the doll in plastic wrap before inserting it.
If necessary, insert a cake dowel or straw next to the doll for extra stability.
️ Fill any gaps around the doll’s waist with extra frosting or fondant to secure it in place.
4️⃣ Frosting Problems (Melting, Cracking, or Smudging)
Decorating a Barbie cake requires patience, especially when working with frosting.
🚫 Mistake:
- Applying frosting to a warm cake, causing it to melt.
- Using too much frosting, making it difficult to achieve smooth designs.
- Not chilling buttercream before piping delicate decorations.
✅ Solution:
Always cool the cake completely before applying frosting.
If using buttercream, refrigerate it for 10-15 minutes to thicken before decorating.
Use an offset spatula for smooth application and a piping bag for detailed designs.
5️⃣ Decorations Not Sticking Properly
Fondant, edible pearls, or glitter may not adhere to the cake if not applied correctly.
🚫 Mistake:
- Applying decorations to dry buttercream or fondant.
- Using too much water or glue, making the decorations slide off.
✅ Solution:
Lightly brush water or edible glue onto fondant before attaching decorations.
️ If using buttercream, press decorations gently while the frosting is still soft.
️ Store the cake in a cool, dry place to prevent decorations from sweating or falling off.
6️⃣ Not Planning for Storage and Transport
After spending hours decorating, the last thing you want is a damaged cake due to poor storage or transport.
🚫 Mistake:
- Leaving the cake uncovered, causing it to dry out.
- Transporting it without a stable cake board or box.
✅ Solution:
Store the cake in the refrigerator if not serving immediately.
️ Place it in a cake box with a firm base when transporting.
️ If traveling long distances, keep it cool with an insulated box or ice packs.
How to Store and Transport the Cake
Once your Barbie cake is beautifully decorated, it’s essential to store and transport it properly to keep it fresh and prevent damage before serving. Here’s how to do it the right way.
1️⃣ How to Store a Barbie Cake Properly
🚫 Mistake: Storing the cake incorrectly can lead to dryness, melting, or smudged decorations.
✅ Short-Term Storage (Same Day or Next Day Serving)
- Keep the cake at room temperature (in a cool, dry place) for up to 12 hours if using buttercream or fondant.
- If the environment is warm or humid, store the cake in the refrigerator to prevent melting.
- Cover the cake with a cake dome, large box, or plastic wrap (without touching the decorations).
✅ Long-Term Storage (More Than 2 Days)
- If you need to store the cake for several days, keep it in an airtight cake box in the refrigerator.
- Before serving, let the cake sit at room temperature for at least 1 hour so it softens.
- Avoid storing near strong-smelling foods (like onions or garlic), as cakes can absorb odors.
📌 Tip: If using whipped cream frosting, always store the cake in the refrigerator.
2️⃣ How to Transport a Barbie Cake Safely
A Barbie cake can be tricky to move due to its tall structure and delicate decorations. Follow these steps to prevent damage while transporting.
🚫 Mistake: Moving the cake without proper support can cause tilting, smudging, or breakage.
✅ Best Practices for Safe Transport:
Place the cake on a sturdy cake board that’s at least 2 inches larger than the cake itself.
Use a cake box that fits snugly around the cake to prevent shifting.
If transporting in a car, place the cake on a flat surface (like the floor of the car) instead of a seat.
Avoid sudden stops or sharp turns while driving to keep the cake stable.
If the weather is warm, keep the car cool with air conditioning to prevent the frosting from melting.
📌 Tip: If traveling long distances, freeze the cake for 30 minutes before transport to make it firmer and more stable.
3️⃣ Emergency Fixes for Cake Damage
Sometimes, accidents happen while transporting or storing the cake. Here’s how to quickly fix common cake issues:
🚑 Smudged Frosting:
✅ Use a small spatula or clean paper towel to smooth out minor smudges.
🚑 Broken Fondant Pieces:
✅ Apply a tiny amount of water or edible glue to reattach fondant decorations.
🚑 Tilted or Sinking Barbie Doll:
✅ Insert a wooden dowel or skewer next to the doll for extra support.
🚑 Melted Buttercream:
✅ Refrigerate the cake for 15–30 minutes to firm up the frosting again.
Making a Barbie Cake Without an Actual Doll
If you don’t have a physical Barbie doll or prefer a completely edible cake, there are creative ways to make a stunning Barbie cake without using an actual toy. Here are some great alternatives!
1️⃣ Edible Barbie Cake Topper
One of the best ways to keep the cake fully edible is by creating a Barbie-shaped topper made of fondant, chocolate, or sugar paste.
✅ How to Make an Edible Barbie Topper:
- Fondant Sculpture: Shape a Barbie figure using colored fondant or modeling chocolate.
- Printed Edible Image: Use an edible printer to print a Barbie image on sugar paper and place it on fondant.
- 3D Chocolate Mold: Pour melted chocolate into a Barbie-shaped mold, let it harden, and place it on the cake.
📌 Tip: If making a fondant figure, let it dry for at least 24 hours before placing it on the cake for stability.
2️⃣ Paper Doll Cutout
For a budget-friendly and quick alternative, use a paper Barbie cutout to create a similar effect.
✅ How to Use a Paper Doll Cutout:
- Print a high-quality image of Barbie and cut it out.
- Laminate the image to protect it from moisture.
- Attach it to a wooden skewer or lollipop stick, then insert it into the cake.
- Decorate the skirt as usual with frosting or fondant to complete the dress.
📌 Tip: For a 3D effect, print and cut out both the front and back of Barbie and tape them together around the skewer.
3️⃣ Using a Barbie Face Print on Fondant
If you only need the top half of Barbie, you can create a fondant or royal icing version of her face and upper body.
✅ How to Make a Barbie Face on Fondant:
- Roll out a thin layer of fondant and cut it into a Barbie silhouette shape.
- Paint facial features using edible food markers or edible paint.
- Attach it to a thicker fondant backing and insert it onto the cake.
📌 Tip: Use a Barbie cookie cutter to shape the fondant figure easily.
4️⃣ Miniature Barbie Accessories as Decorations
If you don’t have a Barbie doll, you can still decorate the cake with miniature Barbie items to maintain the theme.
✅ Fun Barbie Accessories for Cake Decoration:
- Mini tiaras, shoes, or handbags made from fondant or plastic.
- Edible lace, bows, or pearls to mimic Barbie’s fashion.
- Fondant or royal icing Barbie logo placed on the cake board.
📌 Tip: If using plastic accessories, make sure they are clean and food-safe before placing them on the cake.
DIY vs. Buying a Pre-Made Barbie Cake
When planning a Barbie cake, you have two options: baking it yourself (DIY) or buying a pre-made cake from a bakery. Both options have their advantages and challenges. Let’s compare them to help you decide which is best for your needs.
1️⃣ DIY Barbie Cake: Pros and Cons
Making a homemade Barbie cake can be a fun and rewarding experience, especially if you enjoy baking and decorating.
✅ Pros of DIY Barbie Cake:
Cost-Effective – Baking at home is usually cheaper than buying a custom cake.
Customization – You can choose your own colors, flavors, and designs.
Personal Touch – A homemade cake adds sentimental value, especially for a child’s birthday.
️ Dietary Control – You can make the cake gluten-free, dairy-free, or vegan if needed.
🚫 Cons of DIY Barbie Cake:
Time-Consuming – Baking, cooling, and decorating can take several hours.
Requires Skill – Achieving a smooth finish or detailed fondant work can be challenging.
Risk of Mistakes – If the cake doesn’t hold its shape or the frosting melts, fixing it can be stressful.
📌 Best For: Parents or bakers who love creative projects and have time to prepare.
2️⃣ Buying a Pre-Made Barbie Cake: Pros and Cons
If you prefer a stress-free option, ordering a Barbie cake from a bakery can save time and guarantee a professional finish.
✅ Pros of Buying a Barbie Cake:
Saves Time – No need to spend hours baking and decorating.
️ Professional Look – Bakers have experience in detailed cake designs.
️ Custom Order Options – Many bakeries allow you to choose flavors, colors, and themes.
Less Stress – No worrying about structural issues or frosting mishaps.
🚫 Cons of Buying a Barbie Cake:
Expensive – Custom cakes can range from $50 to $200+, depending on the design.
Less Personalization – Some bakeries may have limited designs or may not accommodate special requests.
Advance Booking Needed – Custom cakes often require at least a week’s notice.
📌 Best For: Busy individuals who want a high-quality, professional-looking cake without the hassle of baking.
3️⃣ Cost Comparison: DIY vs. Buying a Barbie Cake
| Expense | DIY Barbie Cake | Pre-Made Barbie Cake |
|---|---|---|
| Cake Ingredients | $10 – $30 | Included in price |
| Buttercream/Fondant | $10 – $20 | Included in price |
| Barbie Doll | $10 – $15 | Some bakeries provide, some don’t |
| Decorations (Pearls, Glitter, etc.) | $10 – $25 | Included in price |
| Labor | Free (Your Time) | Bakery charges |
| Total Cost | $30 – $70 | $50 – $200+ |
💡 Tip: If you want a budget-friendly option, consider a semi-homemade approach—buy a plain cake from a store and decorate it yourself!
Final Verdict: Which Option is Best for You?
🔹 Choose DIY If:
enjoy baking and want to personalize the cake.
have time and patience to decorate.
want a budget-friendly option.
🔹 Choose Pre-Made If:
You need a professional finish without stress.
You’re short on time.
You’re willing to pay for convenience.
Either way, the Barbie cake will be the highlight of the celebration! 🎂🎀
Gluten-Free and Vegan Barbie Cake Options
For those with dietary restrictions, a gluten-free or vegan Barbie cake is a fantastic alternative. You can still create a delicious and beautiful cake without traditional ingredients. Here’s how!
1️⃣ Gluten-Free Barbie Cake Recipe
A gluten-free cake needs a strong structure to hold the Barbie doll while remaining soft and moist.
✅ Ingredients:
- 2 ½ cups gluten-free all-purpose flour (with xanthan gum)
- 1 ½ cups sugar
- 1 cup unsalted butter (or dairy-free alternative)
- 4 eggs (or egg replacer for vegan option)
- 1 cup milk (or almond/oat milk)
- 1 tbsp vanilla extract
- 1 tbsp baking powder
- ½ tsp salt
✅ Instructions:
1️⃣ Preheat oven to 350°F (175°C) and grease cake pans.
2️⃣ Cream butter and sugar together until light and fluffy.
3️⃣ Add eggs one at a time, mixing well.
4️⃣ Sift in gluten-free flour, baking powder, and salt.
5️⃣ Add milk and vanilla, mixing until smooth.
6️⃣ Pour batter into cake pans and bake for 30-40 minutes.
7️⃣ Cool completely before decorating.
📌 Tip: Use a sturdy gluten-free flour blend (like Bob’s Red Mill or King Arthur) to prevent crumbling.
2️⃣ Vegan Barbie Cake Recipe
A vegan cake replaces eggs, dairy, and butter while maintaining a soft texture.
✅ Ingredients:
- 2 ½ cups all-purpose flour (or gluten-free flour)
- 1 ½ cups sugar
- ½ cup coconut oil or vegetable oil
- 1 cup almond milk + 1 tbsp vinegar (buttermilk substitute)
- 1 tbsp baking powder
- ½ tsp baking soda
- 2 tbsp cornstarch or applesauce (egg replacer)
- 1 tbsp vanilla extract
✅ Instructions:
1️⃣ Preheat oven to 350°F (175°C) and prepare cake pans.
2️⃣ Mix almond milk with vinegar and let sit for 5 minutes.
3️⃣ In a bowl, whisk flour, sugar, baking powder, and baking soda.
4️⃣ Add oil, vanilla, and almond milk mixture. Stir until smooth.
5️⃣ Pour batter into cake pans and bake for 30-40 minutes.
6️⃣ Let cakes cool completely before frosting.
📌 Tip: Vegan cakes can be softer, so refrigerate before carving for stability.
3️⃣ Dairy-Free & Vegan Frosting Options
You can make a delicious Barbie cake frosting without butter or cream.
Vegan Buttercream Frosting:
- 1 cup dairy-free butter
- 3 cups powdered sugar
- 2 tbsp almond milk
- 1 tsp vanilla extract
Coconut Whipped Cream:
- 1 can full-fat coconut milk (chilled overnight)
- 2 tbsp maple syrup
- 1 tsp vanilla extract
Vegan Fondant:
- 4 cups powdered sugar
- 1 cup corn syrup or agave
- ½ tsp vanilla extract
📌 Tip: If using coconut whipped cream, keep the cake refrigerated until serving.
4️⃣ Decorating a Gluten-Free or Vegan Barbie Cake
Just like a regular Barbie cake, you can decorate using:
Dairy-free colored buttercream
Vegan fondant for smooth designs
Edible glitter and sugar pearls
Coconut flakes for a textured gown look
💡 Bonus Idea: Use fresh fruit like strawberries or raspberries to add a natural, elegant touch.
To enhance the reader’s experience and provide related recipes, here are some internal linking opportunities:
- If you’re looking for another elegant dessert, try this Cherry Cheesecake Recipe, a creamy delight perfect for any occasion.
- Love fusion foods? Check out this Mexican Pizza Recipe for a crispy and cheesy homemade treat.
- Want more sweet treats? Try making Brownie Cookies, the ultimate chewy and fudgy dessert.
Frequently Asked Questions
1️⃣ Can you use a bundt pan for a Barbie cake?
Yes! A bundt pan is a great alternative for shaping a Barbie cake skirt because it already has a hollow center, making it easier to insert the Barbie doll.
✅ How to Use a Bundt Pan for a Barbie Cake:
- Bake a cake in a bundt pan and let it cool completely.
- If needed, bake an additional round cake layer to add height.
- Stack the bundt cake on top of the round cake and trim the edges for a smooth skirt shape.
- Insert the wrapped Barbie doll into the center and decorate as desired.
📌 Tip: If the hole in the bundt cake is too wide, fill it with cake scraps or frosting to hold the Barbie securely.
2️⃣ How much should I charge for a Barbie cake?
The price of a custom Barbie cake depends on factors like size, ingredients, decoration complexity, and location.
✅ General Price Range:
- Homemade Barbie Cake: $40 – $80
- Bakery Custom Barbie Cake: $70 – $200+
- Luxury Designer Barbie Cake: $250+ (with intricate fondant work & detailing)
💰 Factors That Affect Pricing:
Cake Size & Servings – Larger cakes cost more.
Ingredients Used – Vegan, gluten-free, or premium ingredients may increase the cost.
Decoration Complexity – Fondant, edible pearls, and 3D details require more labor.
Time & Effort – The more detailed the cake, the higher the price.
📌 Tip: If selling homemade cakes, factor in ingredients, labor, and delivery costs before setting a price.
3️⃣ How do you store a Barbie cake?
Proper storage keeps a Barbie cake fresh and prevents decorations from melting or smudging.
✅ Short-Term Storage (Same Day or Next Day Serving):
- Store at room temperature (in a cool, dry place) for up to 12 hours if using buttercream or fondant.
- Cover the cake lightly with a cake dome, box, or plastic wrap (avoid touching decorations).
✅ Long-Term Storage (2+ Days):
- Refrigerate the cake in a sealed cake box to maintain freshness.
- Let the cake come to room temperature for 1 hour before serving to soften.
📌 Tip: If using whipped cream or perishable fillings, always refrigerate the cake.
4️⃣ How many people will a Barbie cake feed?
The number of servings depends on the size and height of the cake.
✅ General Servings Guide:
- 6-inch Barbie cake → 10-12 servings
- 8-inch Barbie cake → 15-20 servings
- 10-inch Barbie cake → 25-30 servings
- Tall multi-layer Barbie cake → 35+ servings
📌 Tip: If serving a large party, consider making an extra sheet cake in the same flavor to serve more guests without increasing the Barbie cake size.
Conclusion
A Barbie cake is more than just a dessert—it’s a show-stopping centerpiece that brings excitement and joy to any celebration. Whether you’re making one for a child’s birthday, a themed party, or just for fun, the process allows for creativity and personalization.
By following the steps in this guide, you can:
Choose the right Barbie doll or an alternative topper.
Bake a sturdy and delicious cake that holds its shape.
Assemble and carve the perfect Barbie dress.
Decorate using buttercream, fondant, or creative edible accents.
Store and transport the cake properly to keep it looking flawless.
Even if you’re new to cake decorating, with patience and practice, you can create a stunning Barbie cake that will wow your guests! 🎂✨
Whether you choose a classic pink princess theme, a Frozen-inspired cake, or a glamorous fashionista design, the final result will be a magical masterpiece that makes any celebration extra special.
Happy baking! 💖🎀
Barbie Cake Recipe – A Stunning Doll Cake for Special Occasions
Equipment
- ✔️ Mixing Bowls – For preparing the batter and frosting.
- ✔️ Electric Mixer or Stand Mixer – Helps achieve a smooth and fluffy batter.
- ✔️ Cake Pans (6-inch or 8-inch, 3 to 5 layers) – Forms the Barbie cake base.
- ✔️ Dome-Shaped Cake Pan or Bundt Pan (Optional) – Helps create a natural skirt shape.
- ✔️ Cooling Rack – Prevents excess moisture in the cake.
- ✔️ Serrated Knife – For leveling cake layers.
- ✔️ Cake Turntable – Makes decorating easier.
- ✔️ Offset Spatula – For smooth frosting application.
- ✔️ Piping Bags & Tips – Used for intricate buttercream designs.
- ✔️ Rolling Pin – If using fondant for dress decorations.
- ✔️ Cake Board – Provides stability when transporting.
- ✔️ Wooden Dowel or Straw – Helps support the Barbie doll inside the cake
Ingredients
- For the Cake:
- 2 ½ cups all-purpose flour or cake flour for a softer texture
- 1 tbsp baking powder
- ½ tsp salt
- 1 cup unsalted butter room temperature
- 1 ½ cups granulated sugar
- 4 large eggs
- 1 tbsp vanilla extract
- 1 cup whole milk or buttermilk for extra moisture
- For the Buttercream Frosting:
- 1 ½ cups unsalted butter room temperature
- 4 cups powdered sugar
- 2 tbsp heavy cream or milk
- 1 tbsp vanilla extract
- Gel food coloring pink, purple, or desired dress color
- For Decoration:
- 1 Barbie doll wrapped in plastic wrap
- Edible pearls glitter, or sugar flowers
- Fondant optional, for dress details
Instructions
- Step 1: Bake the Cake Layers
- 1️⃣ Preheat your oven to 350°F (175°C). Grease and line cake pans with parchment paper.
- 2️⃣ In a bowl, whisk flour, baking powder, and salt. Set aside.
- 3️⃣ In a mixing bowl, beat butter and sugar until light and fluffy.
- 4️⃣ Add eggs one at a time, mixing well after each. Stir in vanilla extract.
- 5️⃣ Alternate adding the dry ingredients and milk, mixing until smooth.
- 6️⃣ Divide the batter between cake pans and bake for 30-35 minutes or until a toothpick inserted in the center comes out clean.
- 7️⃣ Let cakes cool on a cooling rack before assembling.
- Step 2: Stack and Carve the Cake
- 1️⃣ Trim the tops of each cake layer to level them.
- 2️⃣ Stack layers with a thin buttercream layer between each.
- 3️⃣ Use a serrated knife to carve the top layers into a dome shape, creating a flowing gown look.
- 4️⃣ Apply a thin crumb coat of frosting and chill for 30 minutes.
- Step 3: Insert the Barbie Doll
- 1️⃣ Wrap the Barbie doll’s lower half in plastic wrap to keep it food-safe.
- 2️⃣ Create a hole in the center of the cake using a small knife.
- 3️⃣ Gently insert the Barbie doll into the hole, securing it in place with extra frosting if needed.
- Step 4: Decorate the Barbie Cake
- 1️⃣ Color the buttercream with gel food coloring of your choice.
- 2️⃣ Use a piping bag and star tip (Wilton 1M) to pipe rosettes or ruffles around the dress.
- 3️⃣ If using fondant, roll it out and cut pleats or frills to attach to the skirt.
- 4️⃣ Add edible pearls, glitter, or sugar flowers for extra elegance.
- 5️⃣ Smooth the bodice area of the doll with buttercream or fondant to blend it with the cake.
- Step 5: Chill and Serve
- 1️⃣ Refrigerate the cake for at least 30 minutes before serving to set the frosting.
- 2️⃣ Carefully slice around the Barbie doll when serving.
- 3️⃣ Enjoy your stunning homemade Barbie cake! 🎂🎀
Notes
💡 If your cake is too soft to carve, chill it in the fridge for 1 hour before sculpting.
💡 For a fully edible alternative, replace the Barbie doll with a fondant figurine.