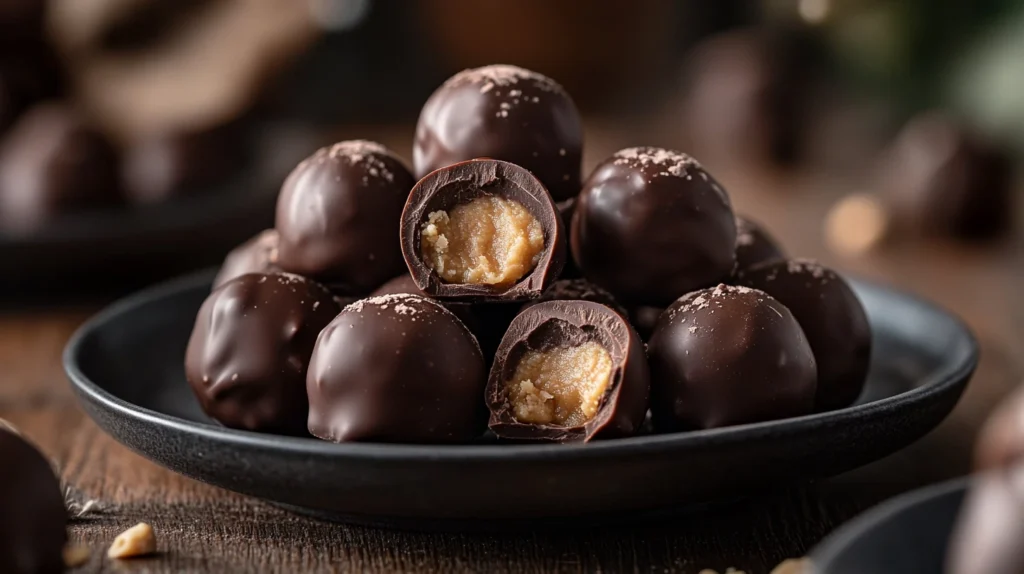
If you’re a fan of Peanut butter and chocolate, then this peanut butter balls recipe is about to become your new favorite treat! These no-bake, bite-sized delights are packed with rich, creamy peanut butter and coated in a smooth layer of chocolate, making them an irresistible dessert for any occasion. Whether you’re preparing them for the holidays, a party, or just as a sweet snack, this simple recipe delivers maximum flavor with minimal effort.
What Are Peanut Butter Balls Recipe?
Peanut butter balls Recipe are small, round confections made from a mixture of peanut butter, butter, powdered sugar, and sometimes graham cracker crumbs or vanilla for extra texture and flavor. Once formed into bite-sized balls, they are dipped in melted chocolate and left to set until firm. They’re similar to Buckeye candies, a popular Ohio treat, except peanut butter balls are usually fully coated in chocolate rather than leaving a small peanut butter center exposed.
Why You’ll Love This Peanut butter balls Recipe
Easy to Make: No baking required—just mix, roll, and dip!
Few Ingredients: Requires simple pantry staples like peanut butter, chocolate, and powdered sugar.
Perfect for Any Occasion: Great for Christmas, parties, or as a year-round treat.
Customizable: You can tweak the recipe to make it keto-friendly, dairy-free, or nut-free.
Kid-Friendly: Fun to make with children since it involves rolling and dipping.
This classic peanut butter balls recipe is not only easy but also deliciously addictive. Ready to get started? In the next section, we’ll go over everything you need to make them at home!
Ingredients Needed For Peanut butter balls Recipe
Before diving into the process, let’s gather everything you’ll need to make perfect peanut butter balls Recipe. This recipe requires only a few basic ingredients, most of which you probably already have in your kitchen.
Main Ingredients Peanut butter balls Recipe
✔ Peanut Butter (1 cup) – Creamy peanut butter works best for a smooth texture, but you can use crunchy if you prefer some added texture. Avoid natural peanut butter, as it tends to separate and makes the mixture too soft.
✔ Butter (½ cup, softened) – Unsalted butter helps create a rich, smooth consistency. If you use salted butter, reduce the added salt in the recipe.
✔ Powdered Sugar (2–2½ cups) – This binds the mixture together and provides the perfect level of sweetness. Start with 2 cups and add more if needed for the right consistency.
✔ Vanilla Extract (1 teaspoon) – Enhances the overall flavor with a touch of warmth and depth.
✔ Chocolate for Coating (2 cups or about 12 oz.) – Semi-sweet chocolate chips or dark chocolate melting wafers work best. You can also use milk chocolate or white chocolate for variations.
✔ Coconut Oil or Shortening (1 tablespoon, optional) – Helps smooth out the melted chocolate for easier dipping and a glossy finish.
Optional Additions and Variations For Peanut butter balls Recipe
Want to experiment with different flavors and textures? Here are some optional ingredients you can add:
Graham Cracker Crumbs (½ cup) – Adds a slightly crunchy texture and helps thicken the peanut butter mixture.
Honey (1–2 tablespoons) – For a natural sweetness boost. If using honey, reduce the powdered sugar slightly.
Sea Salt (½ teaspoon, optional) – Sprinkling a little flaky sea salt on top of the chocolate coating adds a sweet and salty contrast.
Chopped Nuts (¼ cup, optional) – Mix in finely chopped almonds, pecans, or walnuts for extra crunch.
Rice Krispies (½ cup, optional) – Adds a light, crispy texture inside the peanut butter balls.
Cocoa Powder (1 tablespoon, optional) – Mixing a little cocoa powder into the peanut butter mixture deepens the chocolate flavor.
Ingredient Substitutions for Dietary Needs
✅ Dairy-Free Option: Use dairy-free butter alternatives like coconut oil or vegan margarine. Choose dairy-free chocolate for the coating.
✅ Keto/Low-Carb Option: Use powdered erythritol or monk fruit sweetener instead of powdered sugar, and opt for sugar-free chocolate.
✅ Nut-Free Alternative: Replace peanut butter with sunflower seed butter or Wowbutter for a peanut-free version.
Now that you have all your ingredients ready, it’s time to start making these delicious peanut butter balls Recipe! In the next section, we’ll walk through the step-by-step process to ensure perfect results.
Step-by-Step Instructions For Peanut butter balls Recipe
Now that we have all the ingredients ready, let’s walk through the simple process of making these delicious peanut butter balls Recipe. This recipe involves four key steps: preparing the peanut butter mixture, rolling the balls, coating them in chocolate, and chilling for the perfect texture.

Preparing the Peanut butter balls Recipe Mixture
1️⃣ Cream the Peanut butter balls Recipe and Butter
- In a large mixing bowl, combine 1 cup peanut butter and ½ cup softened butter.
- Use a hand mixer or stand mixer on medium speed to blend until smooth and creamy.
2️⃣ Add Vanilla and Powdered Sugar For Peanut butter balls Recipe
- Stir in 1 teaspoon vanilla extract to enhance the flavor.
- Gradually mix in 2 to 2½ cups powdered sugar, one cup at a time, until the dough is thick and holds its shape.
- If using optional ingredients like graham cracker crumbs or honey, mix them in at this stage.
3️⃣ Check the Consistency
- The mixture should be firm but pliable—not too sticky or too dry.
- If it’s too sticky, add a little more powdered sugar. If it’s too crumbly, mix in an extra tablespoon of peanut butter.
Rolling and Shaping the Peanut butter balls Recipe
1️⃣ Scoop and Roll
- Use a small cookie scoop or tablespoon to portion out the peanut butter mixture.
- Roll each portion into smooth, round balls about 1 inch in diameter.
2️⃣ Place on a Lined Baking Sheet
- Arrange the peanut butter balls on a parchment-lined baking sheet to prevent sticking.
- Once all the balls are rolled, place the tray in the freezer for 20-30 minutes to firm up.
💡 Tip: Freezing the peanut butter balls Recipe helps them hold their shape when dipping in warm chocolate.
Coating with Chocolate Peanut butter balls Recipe
1️⃣ Melt the Chocolate
- In a microwave-safe bowl, add 2 cups chocolate chips (semi-sweet, dark, or milk chocolate) and 1 tablespoon coconut oil or shortening (optional, for a smoother coating).
- Microwave in 30-second intervals, stirring after each, until fully melted and smooth.
- Alternatively, melt the chocolate using a double boiler over simmering water.
2️⃣ Dip the Peanut Butter Balls Recipe
- Use a toothpick or fork to dip each peanut butter balls recipe into the melted chocolate.
- Gently tap off excess chocolate on the edge of the bowl.
- Place the coated balls back on the parchment-lined baking sheet.
3️⃣ Decorate (Optional)
- Before the chocolate hardens, sprinkle with sea salt, chopped nuts, or drizzle with white chocolate for a decorative touch.
Chilling and Storing
1️⃣ Let Them Set
- Place the tray in the refrigerator for 30 minutes or until the chocolate is fully set.
2️⃣ Store for Later
- Refrigerator: Store in an airtight container for up to 2 weeks.
- Freezer: Peanut butter balls recipe can be frozen for up to 3 months. Thaw at room temperature before serving.
And that’s it! You now have homemade peanut butter balls recipe that are rich, creamy, and coated in smooth chocolate.
Best Tips for a Perfect Peanut Butter Balls Recipe
Making Perfect Peanut Butter Balls Recipe isn’t difficult, but a few expert tips can take this peanut butter balls recipe from good to absolutely amazing. Here are some essential tricks to ensure your peanut butter balls recipe turns out smooth, well-shaped, and deliciously coated in chocolate. By following these steps, your homemade peanut butter balls will have the perfect texture and flavor every time.
Choosing the Right Peanut butter balls Recipe
✔ Use Regular Creamy Peanut Butter – Brands like Jif or Skippy work best because they contain stabilizers that help the mixture hold together.
❌ Avoid Natural Peanut Butter – While healthier, natural peanut butter separates easily and results in a mixture that’s too soft and oily. If you only have natural peanut butter, stir it well and add an extra tablespoon of powdered sugar to firm up the mixture.
✔ Crunchy Peanut Butter for Texture – If you love a little crunch, you can substitute half of the creamy peanut butter with a crunchy version.
How to Achieve the Perfect Texture
🥄 Balance Moisture and Dryness
- If the peanut butter mixture is too sticky, add more powdered sugar (one tablespoon at a time).
- If the mixture is too crumbly, mix in an extra teaspoon of peanut butter until the dough holds together.
🧊 Chill Before Dipping
- Always freeze the peanut butter balls recipe for at least 20-30 minutes before dipping them in chocolate. This prevents them from falling apart in the warm melted chocolate.
🎯 Uniform Size for Even Coating
- Use a small cookie scoop or tablespoon to portion out the dough for consistently sized balls.
Best Chocolate for Coating
🍫 Use High-Quality Chocolate
- Semi-sweet chocolate chips are a great all-around choice, offering a nice balance of sweetness and richness.
- Milk chocolate makes them sweeter and creamier.
- Dark chocolate (60-70% cocoa) provides a more intense, less sweet flavor.
🔥 Melt Chocolate Correctly
- Microwave Method: Heat in 30-second intervals, stirring each time until smooth.
- Double Boiler Method: Melt chocolate over simmering water for a silkier texture.
💡 Tip: Adding 1 tablespoon of coconut oil or shortening to the chocolate makes it smoother and prevents it from becoming too thick.
Additional Pro Tips for Success
Use a Toothpick or Fork for Dipping
- A toothpick makes it easier to dip each peanut butter ball into the chocolate without getting messy. If a toothpick hole remains, simply smooth it out with a small knife after dipping.
- A fork is great for tapping off excess chocolate.
Let the Chocolate Set Properly
- Place dipped peanut butter balls recipe on a parchment-lined tray and refrigerate until the chocolate hardens completely.
Decorate for a Special Touch
- Before the chocolate sets, sprinkle with crushed nuts, coconut flakes, or a pinch of sea salt for extra flavor and texture.
- Drizzle with white chocolate for a pretty, bakery-style finish.
Peanut Butter Balls Recipe Variations & Dietary Alternatives
One of the best things about peanut butter balls is their versatility! Whether you’re looking for a healthier alternative, a nut-free version, or a low-carb treat, there are plenty of ways to modify this classic recipe to fit your dietary needs.
1. Keto and Low-Carb Peanut Butter Balls
If you’re following a keto or low-carb diet, you can still enjoy these peanut butter balls with a few simple swaps.
Use a Low-Carb Sweetener – Instead of powdered sugar, use powdered erythritol (like Swerve or Lakanto Monk Fruit). This keeps the sweetness without adding unnecessary carbs.
Choose Sugar-Free Chocolate – Use stevia-sweetened chocolate chips like Lily’s or ChocZero for a keto-friendly coating.
Skip the Graham Cracker Crumbs – Some recipes include graham cracker crumbs for texture, but for a lower-carb option, leave them out.
Add Coconut Flour for Firmness – If the dough is too soft, mix in 1–2 teaspoons of coconut flour to help firm it up without extra carbs.
🥜 Keto-Friendly Peanut Butter Balls Recipe (per ball):
- Calories: ~90
- Net Carbs: ~1-2g
- Fat: ~8g
2. Dairy-Free and Vegan Peanut Butter Balls
For a vegan version, swap out the butter and chocolate for dairy-free alternatives.
Use Vegan Butter or Coconut Oil – Replace regular butter with vegan margarine or coconut oil for a plant-based version.
Choose Dairy-Free Chocolate – Brands like Enjoy Life, Hu Kitchen, and Trader Joe’s offer dairy-free chocolate chips or bars perfect for melting.
Ensure the Sugar is Vegan – Some powdered sugars contain bone char. Use an organic or certified vegan powdered sugar.
🥥 Extra Tip: Add shredded coconut to the peanut butter mixture for extra texture and a tropical twist!
3. Nut-Free Peanut Butter Balls
For those with nut allergies, you can easily replace peanut butter with a safe alternative.
Use Sunflower Seed Butter – Brands like SunButter offer a smooth, nut-free option that mimics peanut butter’s texture and taste.
Try Wowbutter – Another great peanut-free alternative, made from roasted soybeans, and safe for nut-free schools.
Omit Nuts from the Toppings – Skip crushed nuts as a topping and try coconut flakes or crispy rice cereal for added texture instead.
🥜 Nut-Free Peanut Butter Balls Taste Just as Good!
While the flavor may be slightly different, sunflower seed butter still provides the same creamy texture, making it a perfect substitute!
4. Fun Flavor Variations
Want to get creative? Try these unique flavor variations to put a twist on the classic peanut butter ball recipe.
🍯 Salted Caramel Peanut Butter Balls
- Mix in 1–2 tablespoons of caramel sauce into the peanut butter mixture.
- Sprinkle flaky sea salt on top after dipping in chocolate.
🍪 Cookies & Cream Peanut Butter Balls
- Crush Oreo cookies into fine crumbs and mix ¼ cup into the peanut butter mixture.
- Coat with white chocolate instead of dark chocolate.
☕ Mocha Peanut Butter Balls
- Add 1 teaspoon of instant coffee or espresso powder to the mixture for a slight caffeine kick.
- Use dark chocolate for a rich, coffee-infused taste.
🍌 Banana Peanut Butter Balls
- Mix in 1 tablespoon of mashed banana for a natural sweetness boost.
- Coat with white chocolate and drizzle with dark chocolate for a banana-split flavor.
🥥 Coconut Peanut Butter Balls
- Add ¼ cup shredded coconut to the mixture for a tropical touch.
- Sprinkle toasted coconut flakes on top before the chocolate sets.
Serving and Storage Tips
Now that your peanut butter balls are perfectly made, let’s go over the best ways to serve, store, and keep them fresh for as long as possible. These little treats are great for special occasions, holiday gifts, or just as a quick snack when you need a sweet bite!

Best Ways to Serve Peanut Butter Balls
✔ Room Temperature or Chilled?
- Peanut butter balls taste great both chilled and at room temperature.
- If you like them firmer and more refreshing, serve them straight from the fridge.
- For a softer texture, let them sit at room temperature for 5-10 minutes before eating.
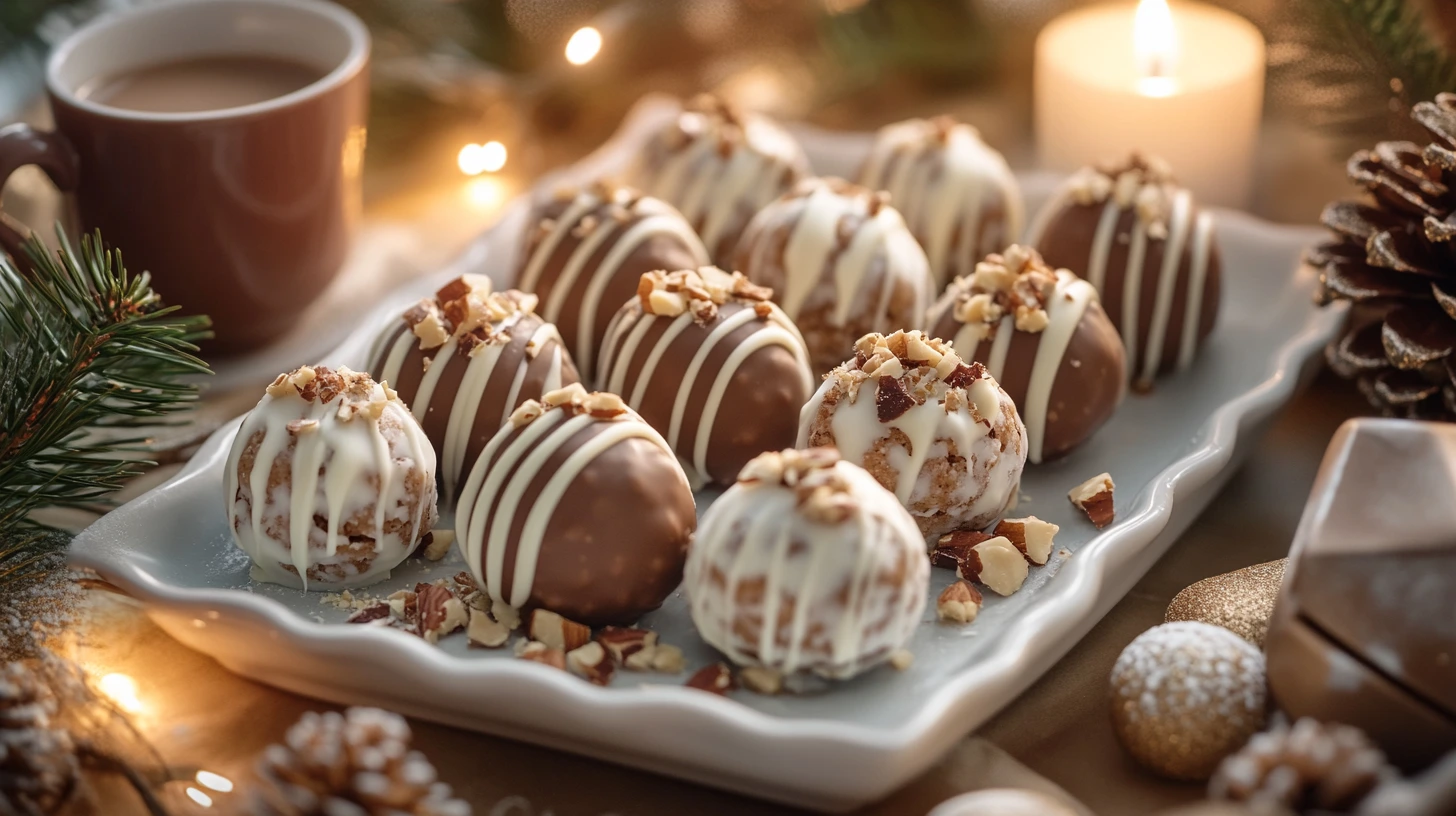
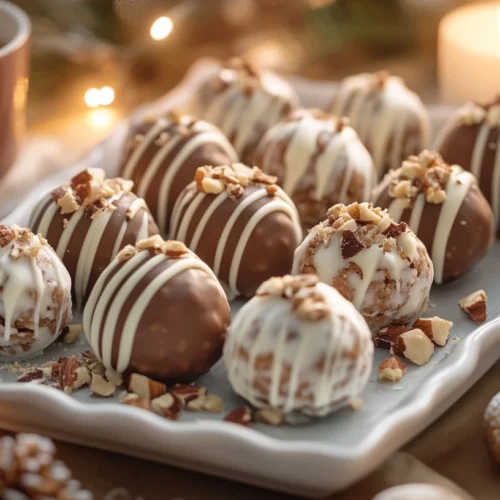
✔ Perfect for Holiday Platters
- Arrange them on a festive dessert tray with other homemade treats like fudge, truffles, or Christmas cookies.
- Place them in mini cupcake liners to keep them separate and looking fancy.
✔ Dipping Ideas
- If you want an extra fancy look, drizzle them with white chocolate, caramel, or even crushed candy canes for a holiday twist.
- Sprinkle chopped nuts, sea salt, or cocoa powder for an elegant finish.
✔ Gifting Peanut Butter Balls
- These make great edible gifts!
- Package them in a decorative tin, cellophane bags, or a holiday box with a ribbon.
- Keep them cool if transporting them in warm weather to prevent the chocolate from melting.
Best Storage Tips for Peanut Butter Balls Recipe
To keep your homemade peanut butter balls fresh and delicious, proper storage is key.
Refrigeration Storage (Best for Short-Term)
✅ Store peanut butter balls in an airtight container in the refrigerator for up to 2 weeks.
✅ Separate layers with parchment paper to prevent them from sticking together.
Freezing Peanut Butter Balls (Best for Long-Term)
✅ If you want to keep them longer, freeze them for up to 3 months.
✅ Place them in a single layer on a baking sheet and freeze for 1-2 hours before transferring them to a freezer-safe container or ziplock bag.
✅ When ready to eat, thaw in the fridge for 30 minutes or enjoy them frozen for a cold, chewy treat.
How to Prevent Chocolate from Blooming (Turning White)
Sometimes, stored chocolate can develop a white or grayish coating called “bloom.” This happens when the chocolate is exposed to temperature changes.
💡 How to Avoid This:
- Keep peanut butter balls in a cool, dry place (not near heat sources).
- Store in a sealed container to reduce moisture exposure.
- If freezing, slowly thaw in the fridge before bringing them to room temperature.
How to Fix Soft or Melting Peanut Butter Balls
🥶 Too Soft? – If peanut butter balls start getting too soft, pop them back in the fridge for 10-15 minutes to firm up.
🔥 Chocolate Melting? – If you live in a warm climate, store peanut butter balls in the fridge or freezer to keep the coating firm.
Common Mistakes to Avoid
Even though making peanut butter balls is simple, a few common mistakes can affect the texture, coating, or overall result. This peanut butter balls recipe is easy to follow, but avoiding these mistakes will ensure your homemade peanut butter balls turn out perfect every time. Whether you’re making this peanut butter balls recipe for the holidays or as a snack, paying attention to these details will help you achieve the best results.
1. Overmixing the Ingredients
🚫 Mistake: Mixing the peanut butter and sugar too much can cause the mixture to become too soft or sticky.
✅ Fix: Stop mixing as soon as the ingredients are well combined and hold their shape when rolled into a ball. If it’s too soft, add a little more powdered sugar to firm it up.
2. Using the Wrong Type of Peanut Butter
🚫 Mistake: Using natural peanut butter can lead to a greasy or too-soft texture because it separates over time.
✅ Fix: Use a stabilized peanut butter like Jif, Skippy, or Peter Pan for the best consistency. If you must use natural peanut butter, stir it very well and add extra powdered sugar if needed.
3. Not Chilling the Peanut Butter Balls Before Dipping
🚫 Mistake: Dipping warm or soft peanut butter balls in melted chocolate will cause them to fall apart in the chocolate.
✅ Fix: Freeze the peanut butter balls for at least 20-30 minutes before dipping them in chocolate. This helps them hold their shape and prevents melting.
4. Melting Chocolate Too Quickly
🚫 Mistake: Overheating the chocolate in the microwave or on the stovetop can cause it to become thick, grainy, or burnt.
✅ Fix: Melt chocolate in short 30-second bursts in the microwave, stirring in between. Alternatively, use a double boiler for a slow and even melt.
5. Not Using a Good Dipping Technique
🚫 Mistake: Dipping peanut butter balls directly with fingers can make them messy, unevenly coated, or leave fingerprints on the chocolate.
✅ Fix: Use a toothpick, fork, or dipping tool to carefully coat each peanut butter ball. After dipping, gently tap off excess chocolate on the side of the bowl for a smooth finish.
6. Not Letting the Chocolate Set Properly
🚫 Mistake: Stacking or storing peanut butter balls before the chocolate has fully hardened can lead to smudges, fingerprints, or chocolate sticking together.
✅ Fix: Let the dipped peanut butter balls set in the fridge for at least 30 minutes before storing them. Place them in a single layer with parchment paper between layers.
7. Storing Them Incorrectly
🚫 Mistake: Leaving peanut butter balls at room temperature for too long can cause the chocolate to soften or melt, especially in warm weather.
✅ Fix: Store peanut butter balls in the refrigerator for up to 2 weeks or freeze them for up to 3 months. Always use an airtight container to maintain freshness.
8. Chocolate Coating Cracks
🚫 Mistake: If peanut butter balls are too cold when dipped in warm chocolate, the sudden temperature change can cause the chocolate to crack as it sets.
✅ Fix: Let peanut butter balls sit at room temperature for 5 minutes after freezing before dipping them in chocolate. This helps prevent cracking.
Love no-fuss, delicious recipes? Check out these easy-to-make dishes from Powerful Recipe!
- For a cheesy, comforting dinner, try this Easy Taco Casserole – a family favorite!
- Looking for a warm and hearty meal? This Cabbage Soup Recipe is both healthy and delicious.
- If you enjoy savory, filling casseroles, don’t miss these Hamburger Casserole Recipes for an easy dinner solution.
Frequently Asked Questions
1. Why Are My Peanut Butter Balls Dry?
🚫 Problem: If your peanut butter balls are too dry or crumbly, it’s likely because there is too much powdered sugar or not enough fat from the peanut butter and butter.
✅ Fix:
- Add more peanut butter (1 tablespoon at a time) until the mixture holds together.
- If the dough is too crumbly, mix in a teaspoon of melted butter or coconut oil to help moisten it.
- Avoid overmixing, as this can dry out the mixture.
2. How to Thicken Up Peanut Butter Balls?
🚫 Problem: If your peanut butter balls are too soft and don’t hold their shape, they need to be thickened.
✅ Fix:
- Add more powdered sugar (1-2 tablespoons at a time) to stiffen the mixture.
- If using natural peanut butter, stir it well before adding it to prevent excess oil from making the mixture too loose.
- Chill the mixture in the fridge for 15–20 minutes before rolling into balls.
3. Do Peanut Butter Balls Go Bad?
✅ Yes, peanut butter balls can go bad over time, especially if they are stored at room temperature.
🔹 How Long Do They Last?
- At Room Temperature: 3-4 days (best stored in a cool, dry place).
- In the Refrigerator: Up to 2 weeks in an airtight container.
- In the Freezer: Up to 3 months in a sealed container or freezer bag.
💡 Tip: If they develop an off smell, a stale taste, or mold (which is rare but possible if stored improperly), discard them immediately.
4. How Many Cups of Peanut Butter Are in a 16 oz Jar?
A 16-ounce jar of peanut butter contains approximately 1¾ to 2 cups of peanut butter.
📏 General Peanut Butter Measurements:
- 1 cup peanut butter = about 8 ounces (½ pound)
- 16-ounce jar = 1¾ to 2 cups
- 32-ounce jar = 3½ to 4 cups
💡 Tip: If a recipe calls for 1 cup of peanut butter, you’ll need about half of a 16-ounce jar.
Conclusion
Peanut butter balls are the perfect no-bake treat—delicious, easy to make, and great for any occasion! Whether you’re making this peanut butter balls recipe for the holidays, as a snack, or as a homemade gift, they never fail to impress.
By following this peanut butter balls recipe, you’ll get smooth, creamy, and chocolate-coated peanut butter balls every time. Plus, with the customizable variations, you can make this peanut butter balls recipe keto-friendly, dairy-free, or nut-free, ensuring everyone can enjoy these homemade peanut butter balls.
Key Takeaways:
✔ Use regular peanut butter for the best texture.
✔ Chill the peanut butter balls before dipping in chocolate to keep them firm.
✔ Melt chocolate slowly to avoid burning or thickening.
✔ Store properly in the fridge or freezer for long-lasting freshness.
Now it’s time to grab your ingredients, start rolling, and enjoy your homemade peanut butter balls! 🍫🥜
Easy No-Bake Peanut Butter Balls Recipe
Equipment
- ✔ Mixing bowl – For combining ingredients
- ✔ Hand mixer or spoon – To blend peanut butter and sugar
- ✔ Measuring cups and spoons – For precise ingredient portions
- ✔ Baking sheet – To place peanut butter balls before chilling
- ✔ Parchment paper – To prevent sticking
- ✔ Fork or dipping tool – For coating the balls in chocolate
- ✔ Microwave-safe bowl or double boiler – For melting chocolate
- ✔ Toothpicks (optional) – For easy dipping
Ingredients
- For the Peanut Butter Mixture:
- 1 cup creamy peanut butter Jif, Skippy, or similar brand
- ½ cup unsalted butter softened
- 2 to 2½ cups powdered sugar adjust for texture
- 1 teaspoon vanilla extract
- For the Chocolate Coating:
- 2 cups semi-sweet chocolate chips or dark/milk chocolate
- 1 tablespoon coconut oil or shortening optional, for smooth coating
- Optional Additions & Variations:
- ½ cup graham cracker crumbs for added texture
- ½ teaspoon sea salt for a sweet-salty contrast
- ¼ cup chopped nuts for crunch
- ½ cup white chocolate for drizzling on top
Instructions
- Step 1: Prepare the Peanut Butter Mixture
- In a large mixing bowl, combine peanut butter and softened butter. Mix until smooth using a hand mixer or spoon.
- Add vanilla extract and gradually mix in powdered sugar, 1 cup at a time, until a thick, dough-like consistency forms.
- If the dough is too sticky, add more powdered sugar. If too dry, mix in an extra tablespoon of peanut butter.
- Step 2: Roll into Balls
- Scoop out small portions (about 1 tablespoon each) and roll them into smooth, round balls using your hands.
- Place the peanut butter balls onto a parchment-lined baking sheet.
- Chill in the freezer for 20–30 minutes to firm up.
- Step 3: Melt the Chocolate
- In a microwave-safe bowl, add chocolate chips and coconut oil (if using). Microwave in 30-second intervals, stirring between each, until fully melted and smooth.
- Alternatively, melt the chocolate using a double boiler over simmering water.
- Step 4: Coat Peanut Butter Balls in Chocolate
- Use a toothpick or fork to dip each peanut butter ball into the melted chocolate.
- Tap off excess chocolate and place back on the parchment-lined tray.
- (Optional) Sprinkle with sea salt, nuts, or drizzle with white chocolate before the chocolate sets.
- Step 5: Chill and Serve
- Refrigerate for 30 minutes until the chocolate is fully hardened.
- Enjoy immediately or store in an airtight container.
Notes
Texture Tip: Chilling the peanut butter balls before dipping helps prevent them from falling apart in the warm chocolate.
Dipping Hack: If using a fork, tap off excess chocolate on the side of the bowl to avoid thick coatings.